WordPress hosting
 WooCommerce hosting
 PrestaShop hosting
 Magento hosting
 Joomla hosting
 Drupal hosting
In this short tutorial, I will explain what nameservers are and how to change them from our client area in a few simple steps.
What are nameservers?
We know exactly what a domain is and how DNS records work. When we talk about web domains, the acronym "NS" stands for "nameserver".
The function of NS records is to provide the correct information to point a domain to a specific server.
For security purposes, a domain must have several nameservers available because it may happen, for example, that one of them is not available at the moment or that a fault occurs. In these situations, DNS requests are forwarded to other available ones.
It is imperative to be careful when changing nameservers. If the procedure is not performed correctly, users will not be able to access the website.
How to change nameservers
To change nameservers, the first thing you need to do is to log in by accessing the client area.
At the top of the page, click on the "Domains" section.
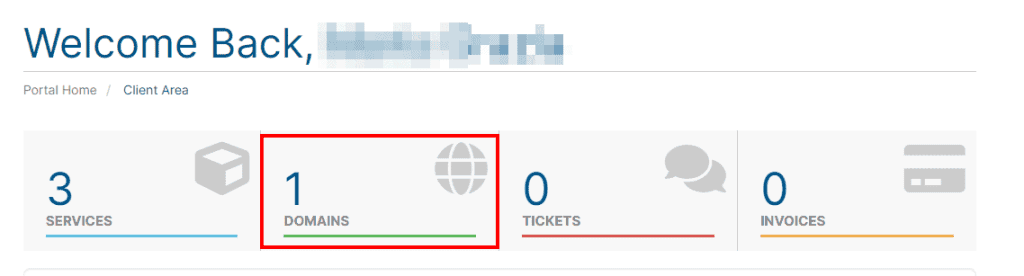
Once the page is loaded, all the domains in your possession will be listed. If you do not find any domains available, it means that you do not have any domains on your account, and, therefore, it is appropriate to register a domain to proceed further with this guide.
In the "Domains" section, you have to choose the domains name to which we want to change the NS records.
By clicking on the drop-down menu located to the right of the icon depicting the wrench and selecting the item "Manage Nameservers", we will be redirected to a page that will allow us to change nameservers for the domain.

In this section, you can choose between two options: default nameservers and custom nameservers.
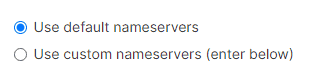
The “Use the default nameservers” option is a default setting already activated when registering the domain.
If you purchased a hosting plan that also includes a free domain in the same order, the default nameservers will be those of the hosting account you bought. In all other cases, our default nameservers will be set, different from those of your hosting account:
- ns-canada.topdns.com
- ns-uk.topdns.com
- ns-usa.topdns.com
The "Use custom nameservers" option allows you to set personal nameservers, just fill in the fields in the correct nameservers.
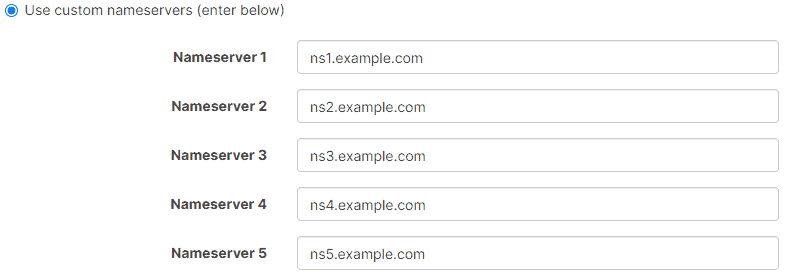
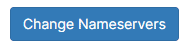
Once you have filled in all the fields correctly, you need to click the blue button at the bottom of the page with the wording "Change Nameservers" to apply the changes you just made.
If the operation is successful, a green box with a success message will appear with the text: “The changes have been saved successfully”.
If once the nameservers have been changed the domain is not visible yet, we could decide to carry out a more thorough check: we can verify that the domain points correctly by simply performing a DNS check.
The DNS propagation process can take several hours, so don't worry if nothing appears to have changed at the time of the nameservers change.