WordPress hosting
 WooCommerce hosting
 PrestaShop hosting
 Magento hosting
 Joomla hosting
 Drupal hosting
DNS management is usually one of the aspects that worries users the most and is pretty tricky to understand.
In this short tutorial, I will guide you during the DNS configuration to manage your domain.
Before proceeding with the guide, however, it is advisable to clarify some basic concepts, explaining what DNS records are and the substantial difference between domain and DNS, so that you can perform the procedure without incurring mistakes.
Table of Contents
Difference between domain and DNS
As you might know, each device connected to a network has an associated IP address. So how is it possible that you can access websites by typing names instead of IP addresses? Simply because there are DNS servers that let you do this.
DNS servers contain a vast list, continuously updated, in which there are many IP addresses, and each of them is associated with a specific name.
Whenever you type the name of your favorite site in the browser's address bar and click "Enter" on your keyboard, you are making a request. This request goes through the DNS servers which in turn direct you to the IP associated with the domain, present in the server's list.
The domain, therefore, is the text string that represents the name of a website, while the DNS has the function of translating the domain entered by the user into a specific IP address, to allow us to access the resources we need.
Thanks to this system, it is possible to access websites using easily memorable names, without having to memorize the IP addresses of each device.
Imagine having to manually type an IP address into your browser's search bar every time you want to access a website, it would be inconvenient, to say the least.
DNS management of a domain
What are DNS records?
DNS records contain all the information needed to respond to user requests, and you can find them in the DNS management options.
There are different types of records for each domain, each with its specific function.
When you decide to register a domain, you also have the opportunity to manage its DNS.
By configuring the various options, it will be possible to point your domain towards the resources you want.
For example, you can make your internet domain point to an existing website, but configure the MX records to use a different mail server.
When editing a record, you must be particularly careful not to make mistakes, otherwise, the site could become unreachable, and users could find themselves with errors such as "DNS_PROBE_FINISHED_NXDOMAIN".
DNS management from the control panel
If you have purchased a domain from us, the first step to manage the DNS is to access the client area.
In the control panel, click on the "Domains" tab.
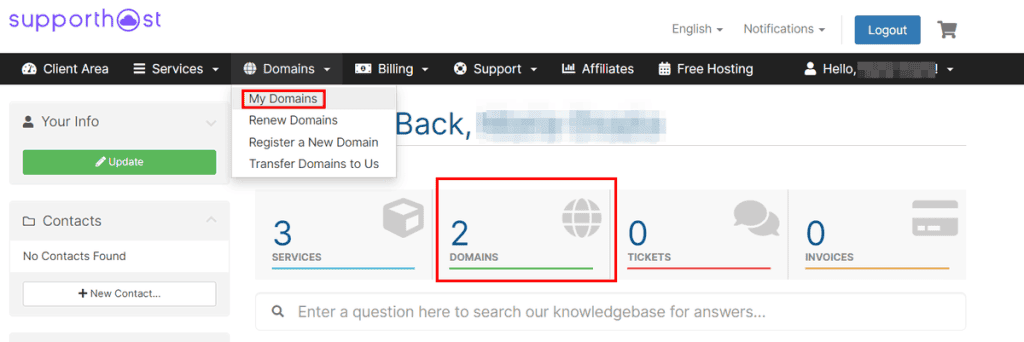
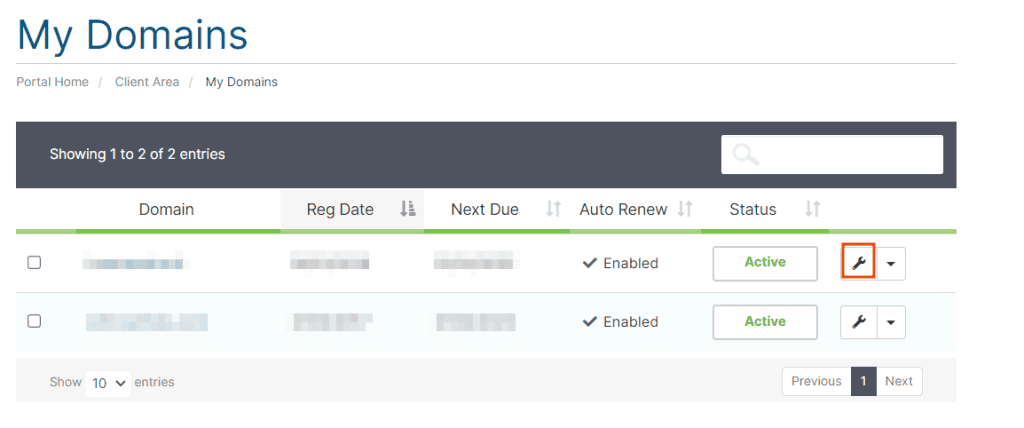
On the next page, you will see a list of all your domains.
At this point, click on the icon that represents a wrench.
In the "Manage" menu, click on the "DNS Management" element.
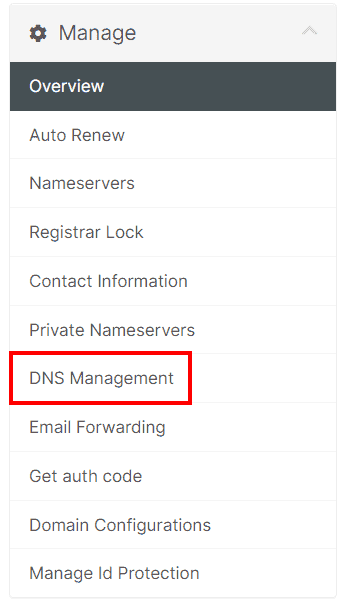
If you have a hosting account linked with the domain, a warning message will appear warning you about the risks we may incur. To proceed, click on the "I'm aware of the risk" button.

You will now have 4 different fields in front of you.
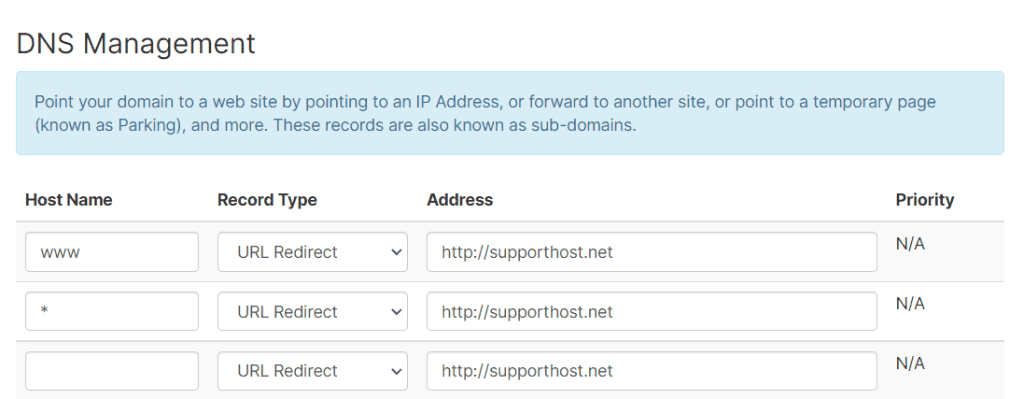
Hostname: represents the name of the Host to be configured, in alphanumeric format. Both letters and numbers can be entered, including dashes “-“.
Record type: from this drop-down menu, it is possible to select which type of DNS record to edit.
Address: enter the IP address, or some other value, of the resource to which you want to point your record.
Priority: For MX records you can determine the priority. The value you set will specify the sequence in which the server will receive the emails. The smaller the value, the higher its priority will be.
Once all the changes have been made, to apply the new settings, click on the blue button "Save changes".

If you need to redirect your domain to another domain, take a look at our guide on how to create a domain redirect.
We remind you that making changes through the DNS management automatically involves setting our registrar's default nameservers, so if ALL DNS records are not set correctly your website will be unreachable since the registrar's default nameservers do not correspond to the nameservers of the server where we host your website. If you need to make changes to the various records, it would be advisable to use the DNS zone editor inside the cPanel***.
DNS management from cPanel
If you purchased a hosting plan with the domain, the best and safest solution is to manage the DNS zones directly from cPanel.
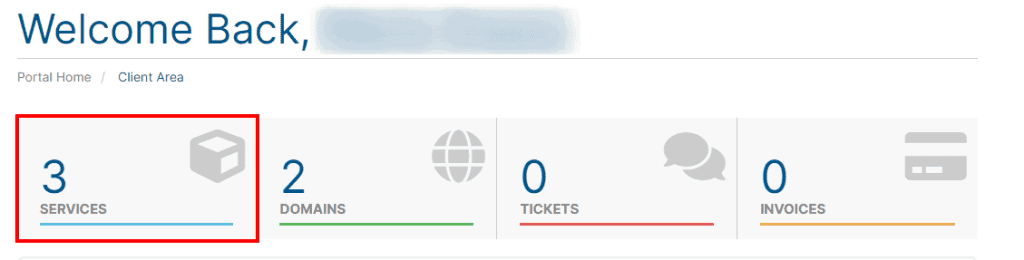
To access cPanel, first of all, you need to access the client area and look for the "Services" tab.
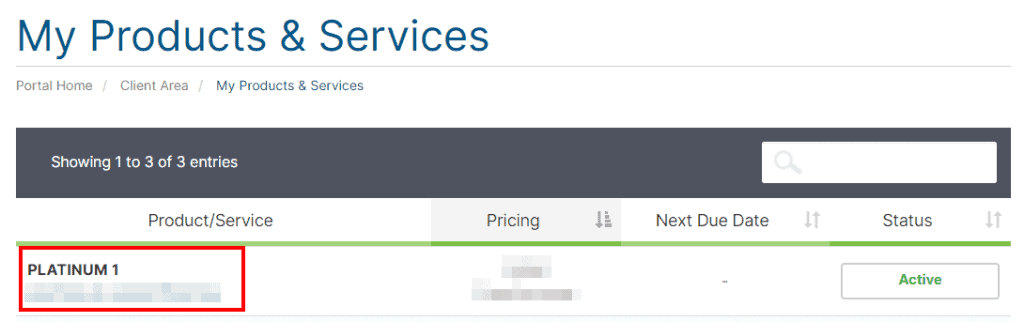
Clicking on the name of the service you purchased, you will be redirected to the management area of the hosting plan.
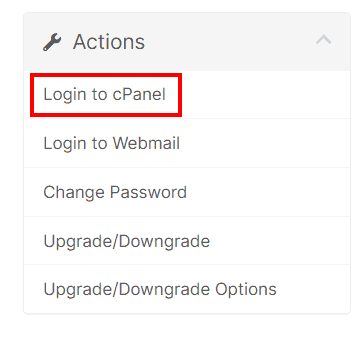
In the “Actions” menu, select the “Login to cPanel” item.
Once cPanel is open, scroll down the page until you find the DOMAINS section, and look for the "Zone Editor" tool.

All domains related to your hosting plan will be listed here. In the table, click on the "Manage" button in the "Actions" column.

Edit a DNS record
Now we see a list of all the DNS records of our domain. To edit a record, simply click on the "Edit" button and fill in the fields as needed.

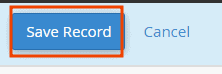
Once the changes have been made, to save the new settings, click on “Save Record”.
Add a DNS record
If instead of modifying a record you want to add a new one, you have to click on the "Add Record" button.

Delete a DNS record
To delete a DNS record instead, just click on the "Delete" button.

Once you have performed all the actions, you can check if your domain points correctly after waiting a few hours by doing a DNS check or using an online tool such as DNS checker.